
This may go without saying. However as a Debian guy, I have to admit that the Debian Wiki is a hot mess when you compare it to the Arch Wiki. It is a holdover from the RTFM days where people whom didn’t know; or did know and were just ***holes would tell you to read the man pages. Like the man pages could somehow help you configure an IRC server. With that said, I don’t like to sit around complaining about life and that is why I decided to help the Debian project help clean up their Wiki:
https://wiki.debian.org/MatthewLeong
This is something I encourage you all to do if you possess the time and technical acumen. I’ll post a separate article on how to volunteer on their Wiki in another article.
Right now I want to provide you step by step directions on how to install the Debian 10 and 11 Network Install image without a GUI.
Why would we want to install it without a window manager? Servers don’t need a window manager and Gnome’s Network Manager makes a mess of CLI management of network stuffs. Running an NGINX instance? Netinst. Running an OpenStack instance? Netinst! Right on, let’s go.
Alibis, n. pl. al·i·bis:
- I use KVM when possible. The performance enhancements are nothing to be scoffed at, however there is no question that VirtualBox (VB) is an easier platform for creating tutorials and such. With that said, I’ll use VB for most Tutorials featuring virtual machines.
- If you are installing this on bare metal, skip the “Configure VirtualBox” section.
Download:
Let’s download the image:
- Torrent (please use it as it’s less taxing on Debian servers: https://cdimage.debian.org/debian-cd/current/amd64/bt-cd/debian-11.4.0-amd64-netinst.iso.torrent
- Direct download: https://cdimage.debian.org/debian-cd/current/amd64/iso-cd/debian-11.4.0-amd64-netinst.iso
Configure VirtualBox:
- Open VB.
- Select New.

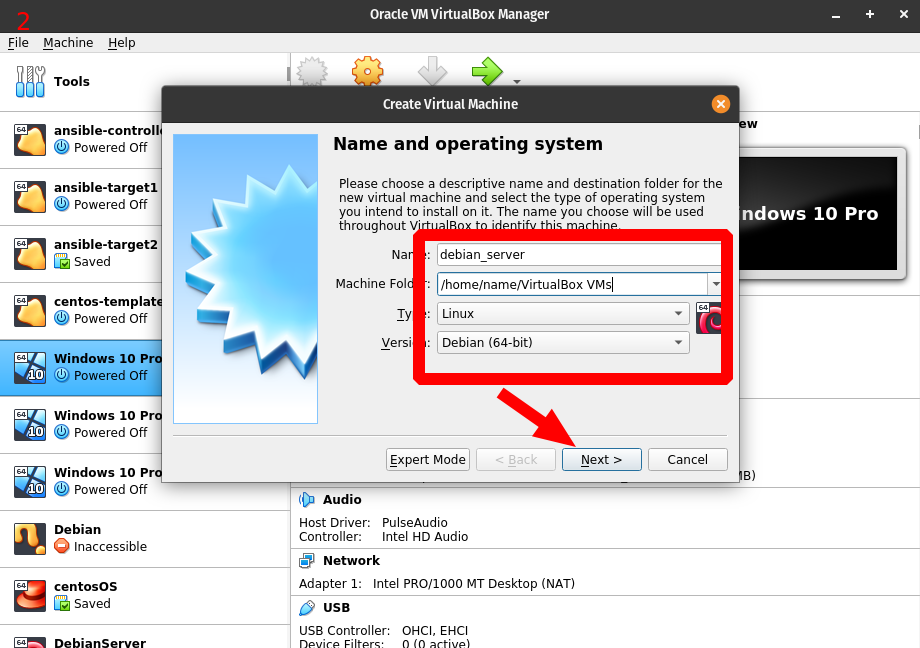
- Input a name for your server to identify it within VB. Anything will work here. I used debian_server.
- Select Linux as the Type.
- Select Debian (64-bit) as the Version.
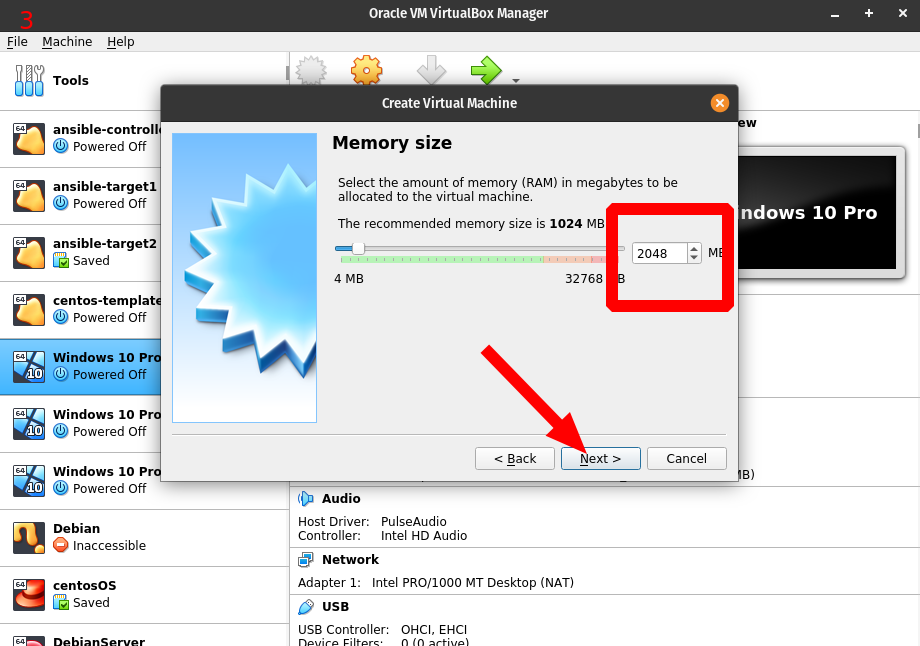
- Input enough RAM to meet your needs. Most servers and test machines need between 1024 and 2048 MB. I normally always select 2048. If you are running something taxing like an OpenStack server you may need to increase this.
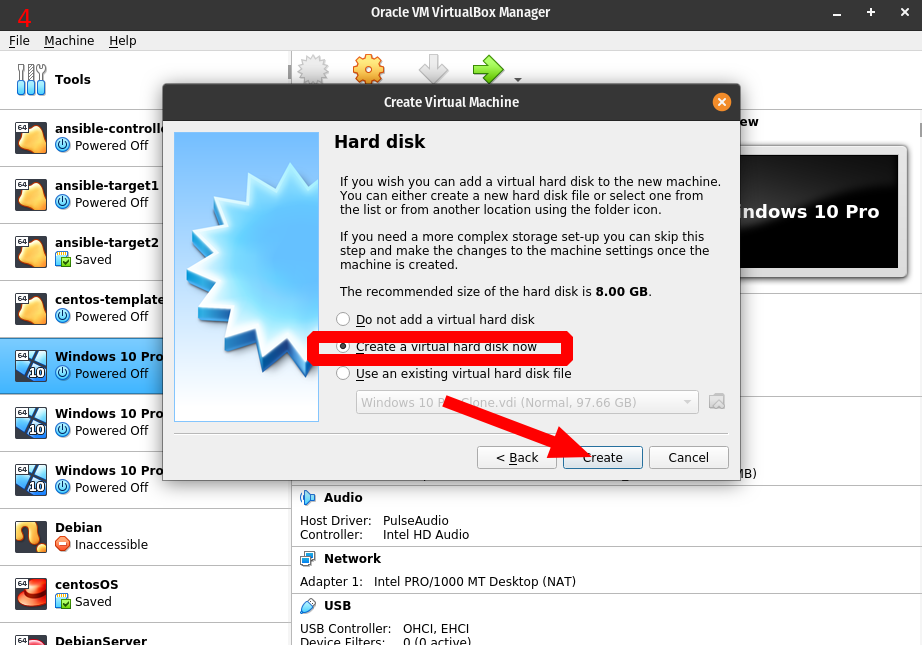
- Select Create a virtual hard disk now.
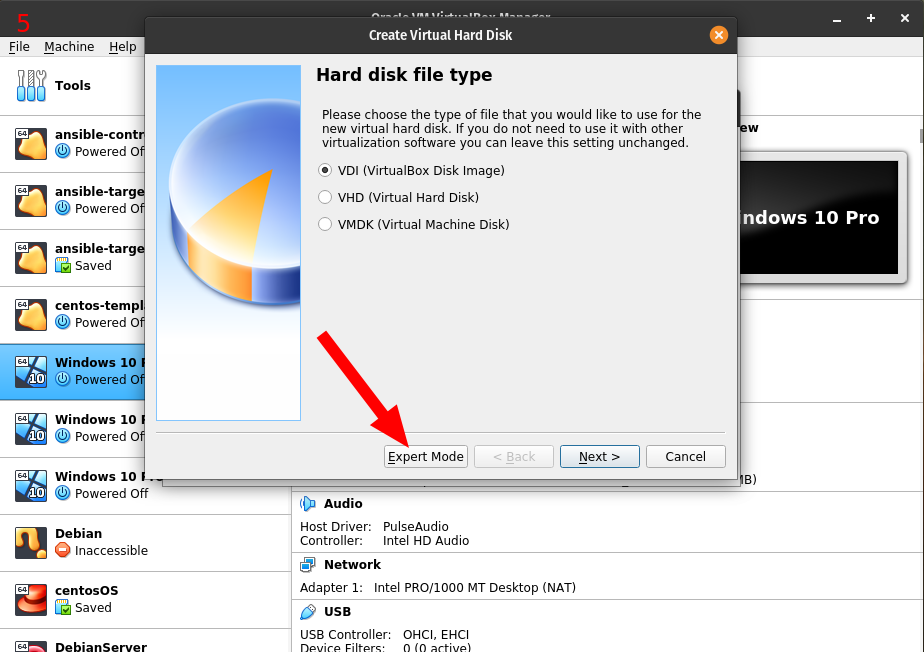
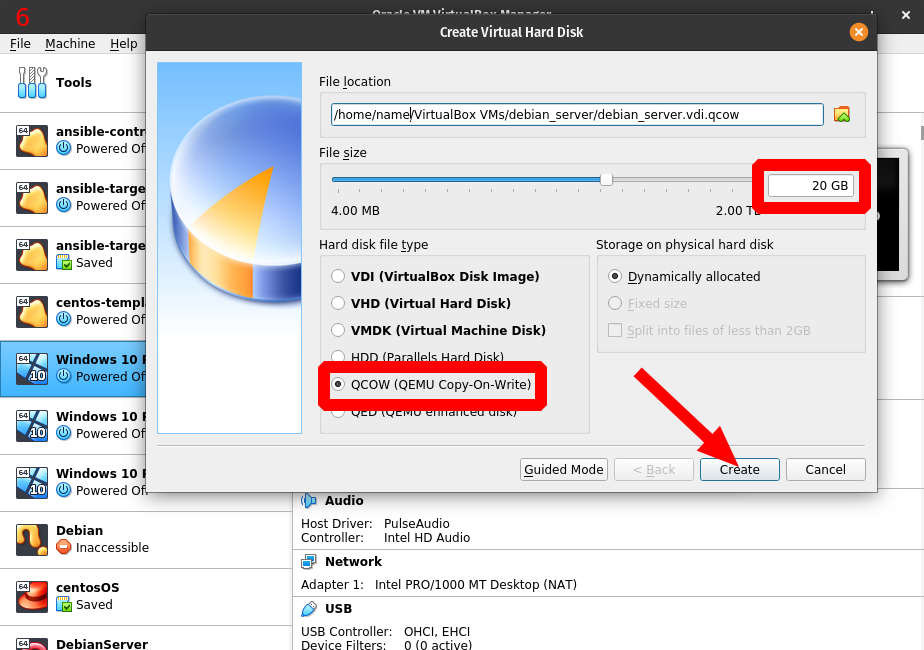
- Select Expert Mode. This is where I will deviate from most tutorials out there. I recommend using KVM/QEMU since the drivers are baked in to the kernel and there is a marked performance improvement over VB. VB, while user friendly, is not a preferred hypervisor for production environments. I have to state that VB is a wonderful piece of software and I have no intention of starting a flame war,, moving on.
- Select your required disk space. I don’t ever use what VB recommends as I often hit a ceiling. I put 20 GB on my test servers. Whatever you choose, select at least the minimum of what VB recommends, and always meet your distro’s requirements.
- Select QCOW (QEMU Copy-On-Write). This is KVM/QEMU’s default format and if you ever intend on running OpenStack instances or the like, this is what you will want to use. For testing purposes, it really doesn’t matter. Just note that you want to future-proof any VM if possible as there is no reason not to. By setting this now, you’ll be able to easily integrate this on different systems in the future.
- Select Create.
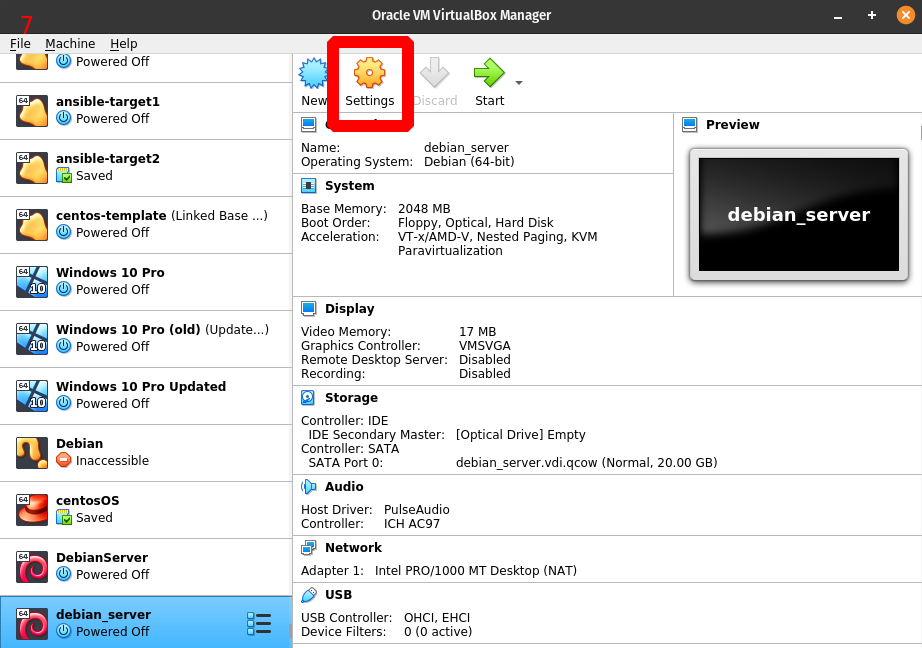
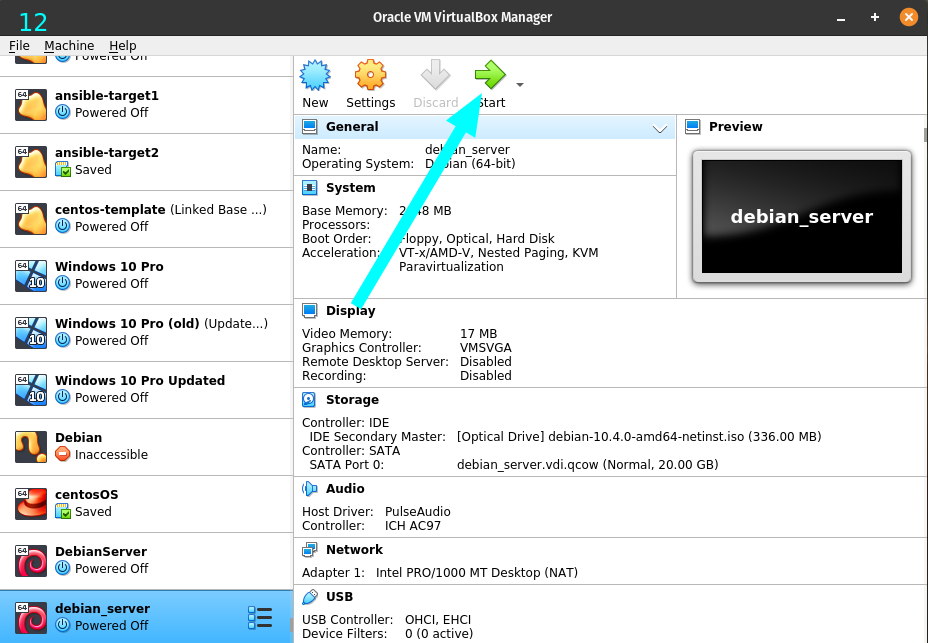
- Ensure your VM is selected on the left column and select Settings as we will first increase the amount of processors we will use from 1 to 2, and we’ll load the Debian image we downloaded in to a virtual drive.
- Select System on the left column.
- Select the Processor tab.
- Change Processor(s) from 1 to 2 and select OK.

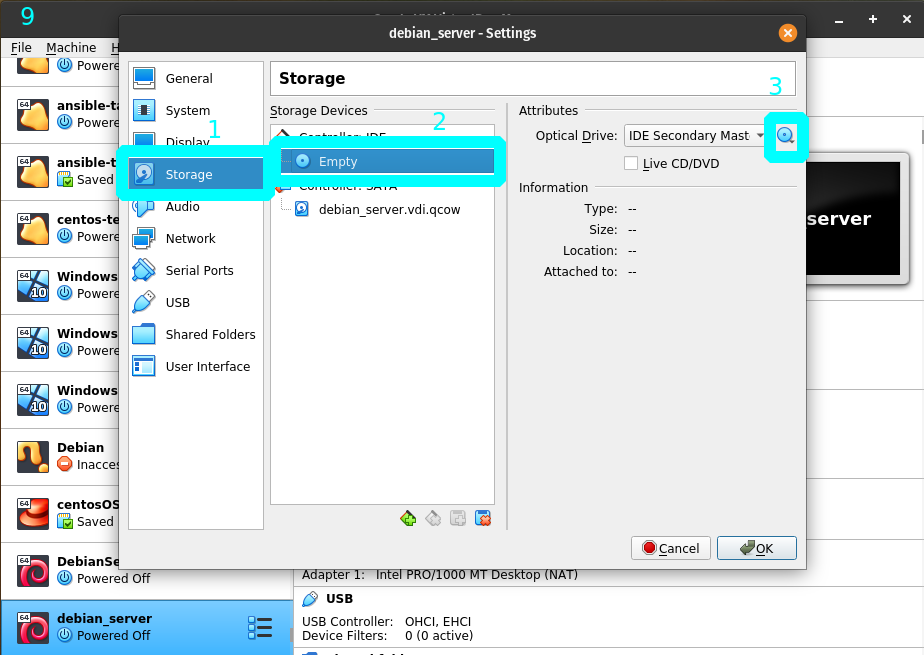
- Select Storage on the left column.
- Select Empty under Storage Devices.
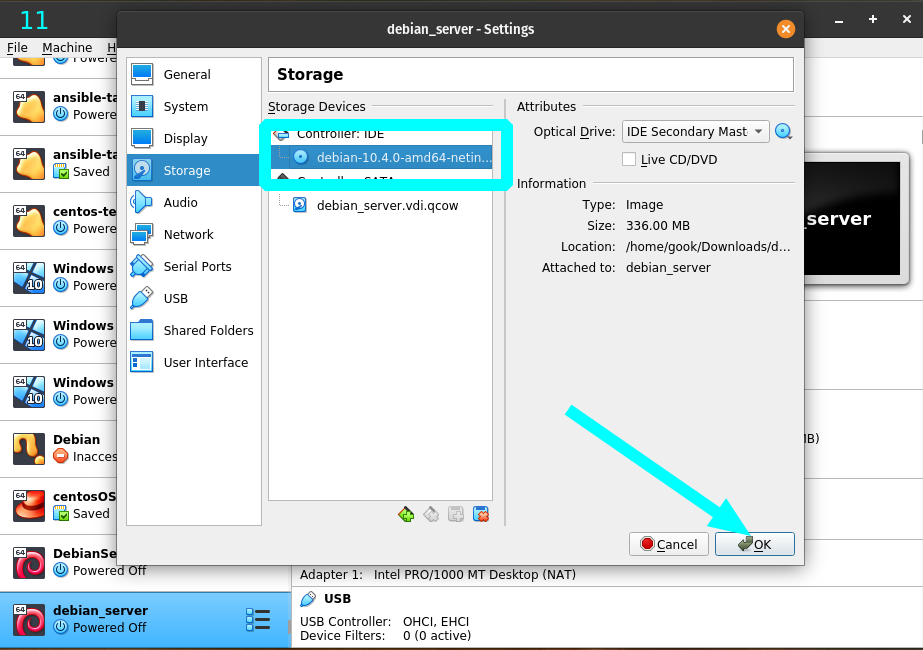
- Select the CD/DVD icon under Attributes as depicted by the teal square.
- Select Choose a disk file…
- A file selection dialog will pop up. Select the Debian image that you downloaded.
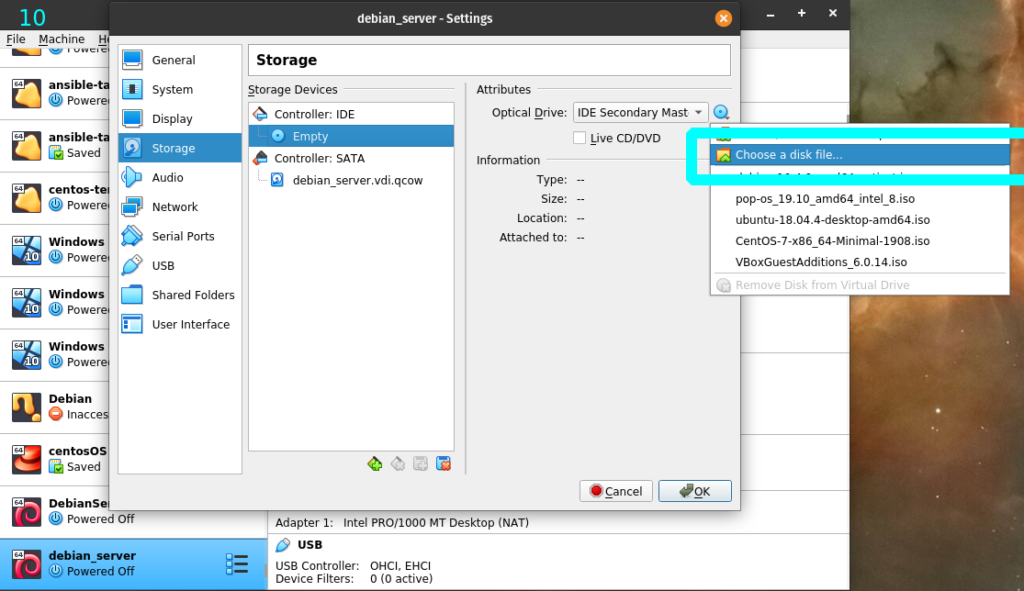
- Note that the Debian image is selected under the Controller: IDE Storage Device.
- Select OK.
- You have fully configured VB to meet the bare minimum settings to run a virtual machine efficiently. You’ll need to change network settings if you want to be able to access your VM from the WAN. Namely, you’ll need to change Settings/Network/Attached to: setting from NAT to Bridged Adapter, and you’ll need to set port forwarding rules on your router etc.
Configure Debian:
- From here on, we will configure Debian. The following is system agnostic and it doesn’t matter whether you use VB/KVM/bare metal. It’s all going to be the same. Note that all settings performed here can be changed once the system is installed.
- If you are configuring this on bare metal, ensure that your Ethernet cable is plugged in now since Debian doesn’t ship with Wi-Fi drivers.
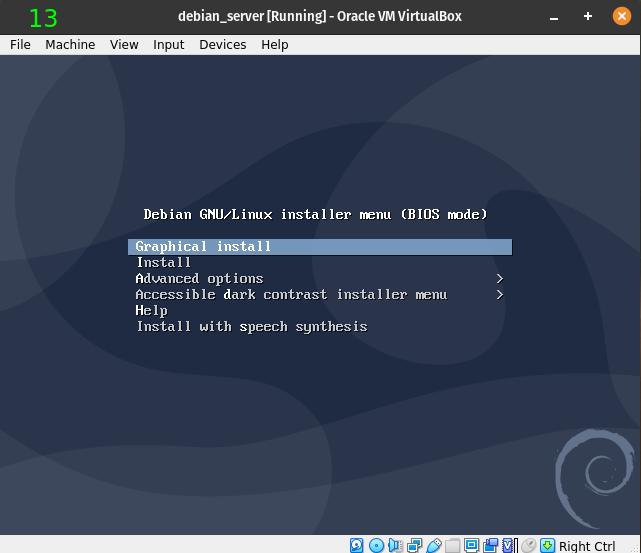
- Select Graphical install.
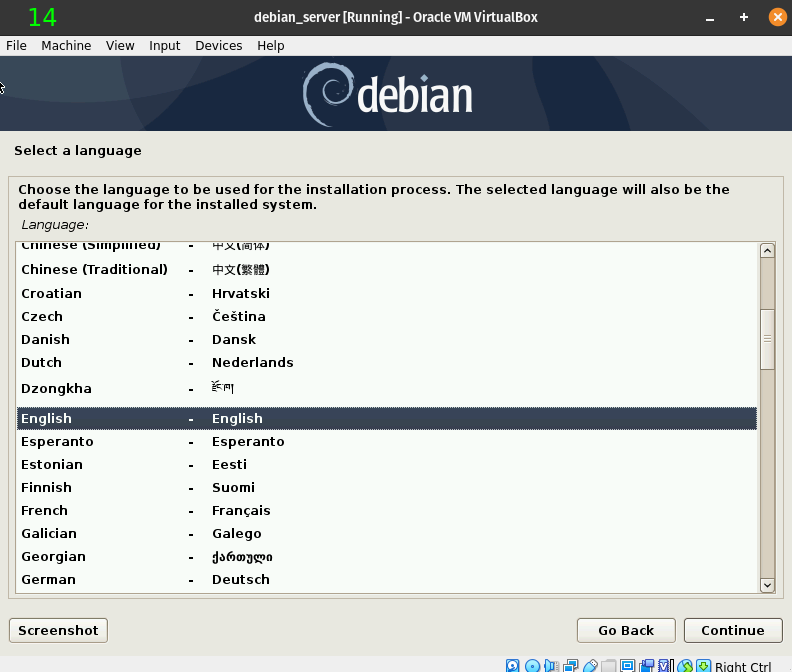
- Select your language and select Continue.
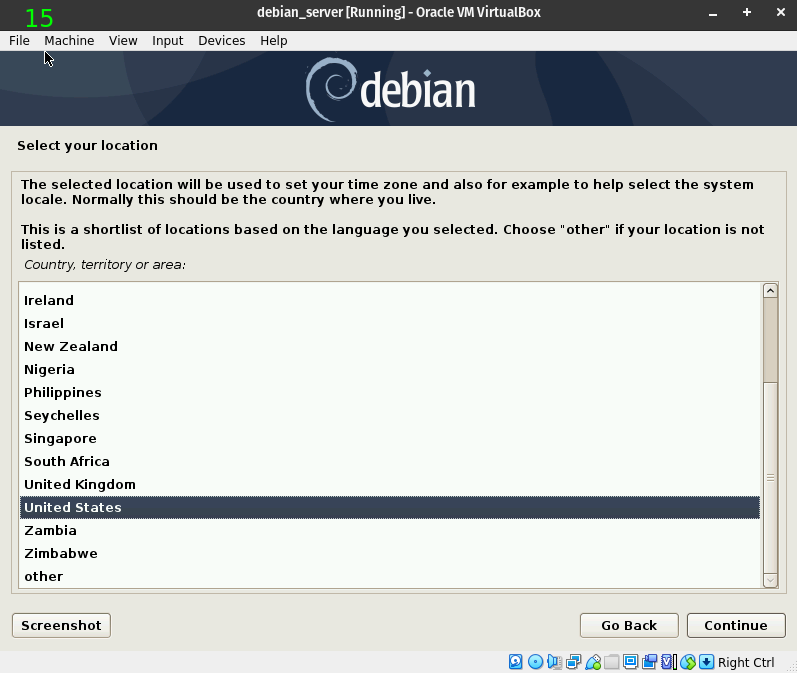
- Select the closest country to you and select Continue.
- Select your keyboard keymap and select Continue.

- Enter you Fully Qualified Domain Name FQDN hostname here. If you are starting a website called realtechreview.com, you will put that here. If this is going to be a server that will be using a subdomain, then enter the whole subdomain here. For example, if you are integrating a jitsi server on “realtechreview.com” then use jitsi.realtechreview.com. If you are only using this for testing or are configuring a desktop environment etc, just input something unique that is not currently used by something else on your network. “bobscomputer” works here.
- Note, do not use spaces, special characters, or very long names. You can type the following at a UNIX terminal on a working system to get the maximum characters in a hostname:
getconf HOST_NAME_MAX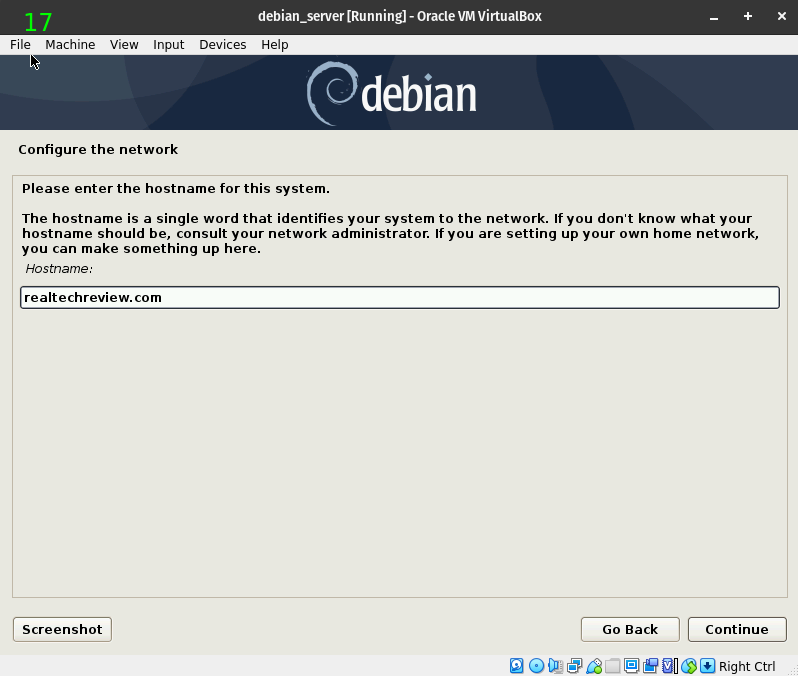
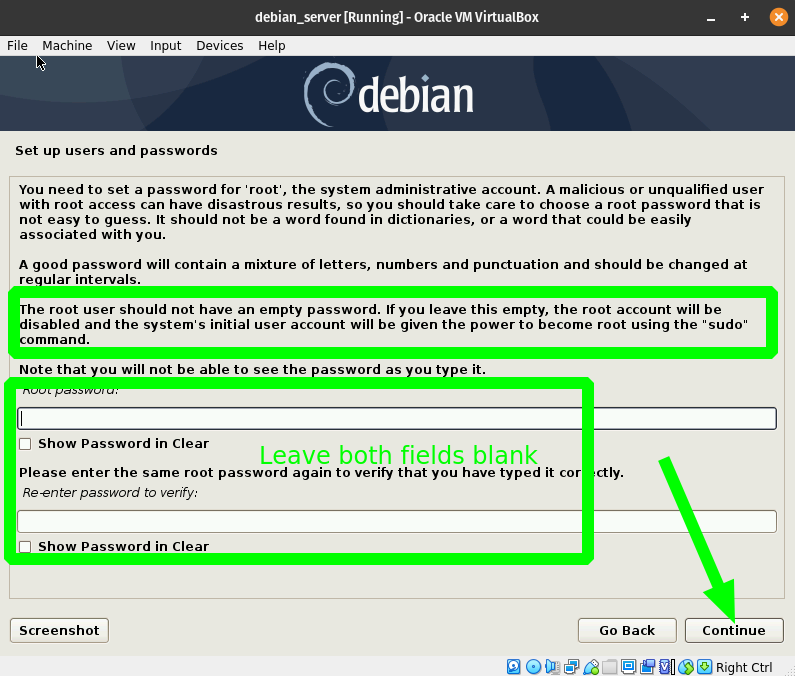
- For security purposes, we want the disable the root user and create a user with sudo privileges. We can automate the creation of a sudo user by leaving these fields blank and selecting Continue.
- Note that is does state this in the 3rd paragraph, however it is easily overlooked.
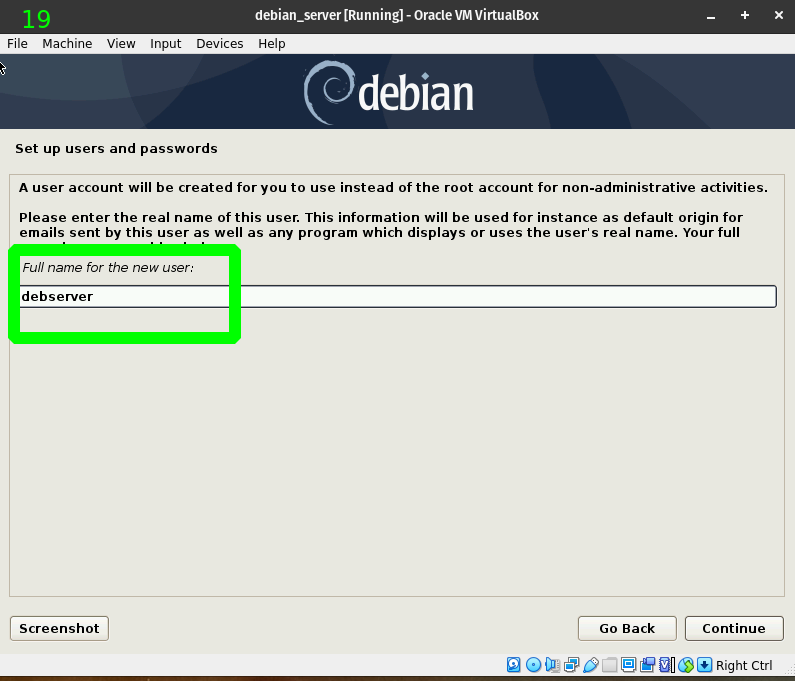
- Input a descriptive name for the superuser account and select Continue. This can be something like Superuser Account or the like and include spaces. Anything works here, however get in to the habit of not using special characters, long names etc. I used debserver here.
- Now enter the actual superuser account that you will log in with. This account has administrative privileges. It must start with a lower-case letter. I again selected debserver.

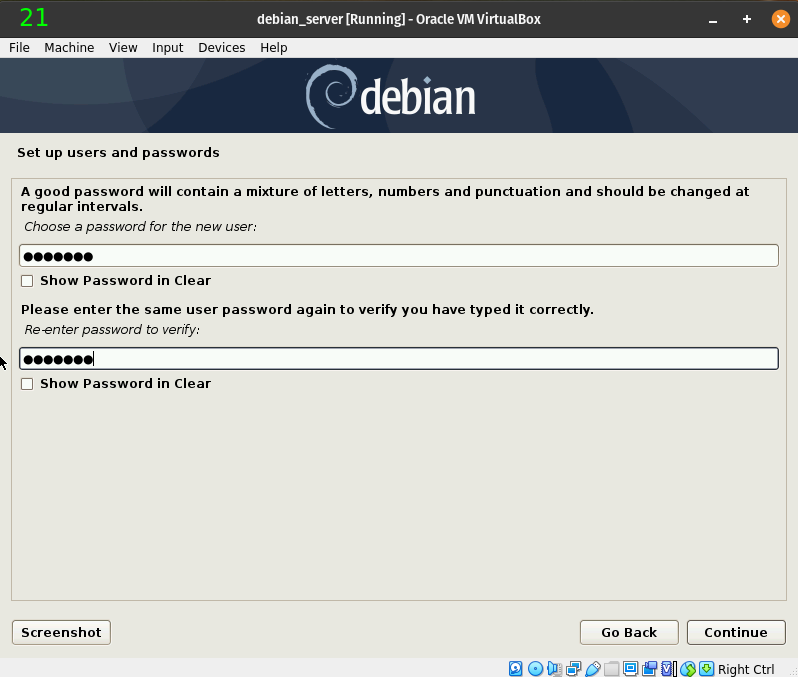
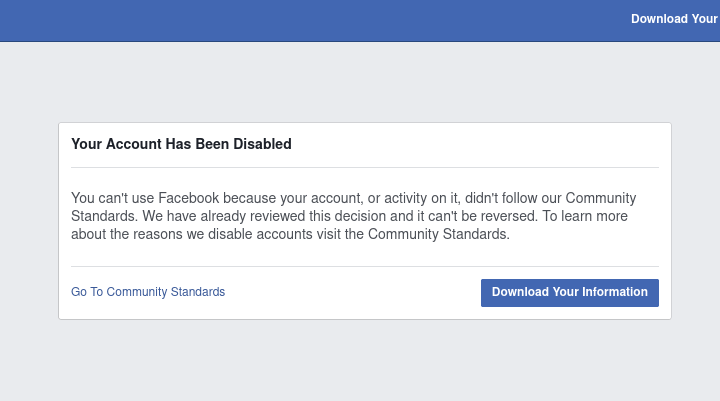
- Choose a strong password or your system will be compromised in a matter of time. I created a weak one for this tutorial and you’ll see what happens when we do.
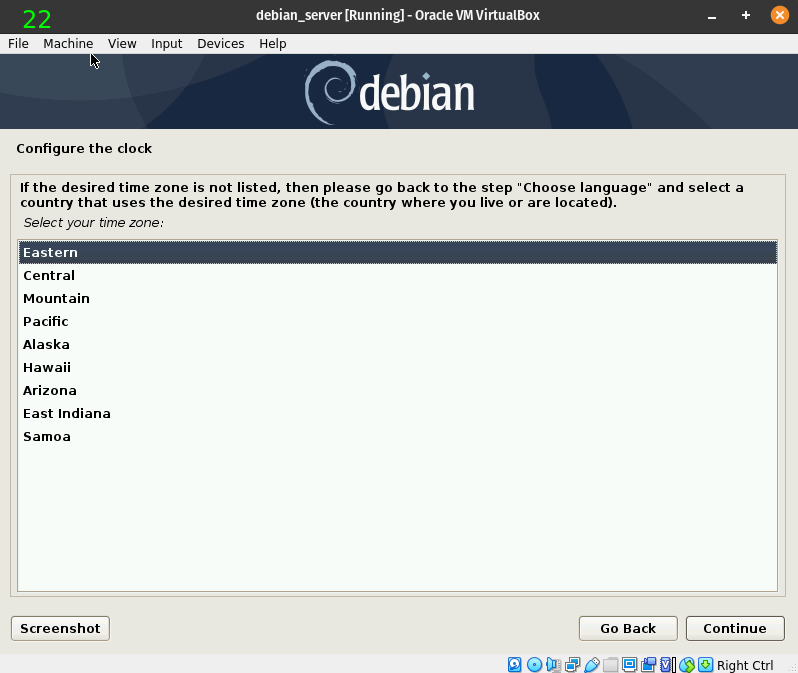
- Select your time zone.
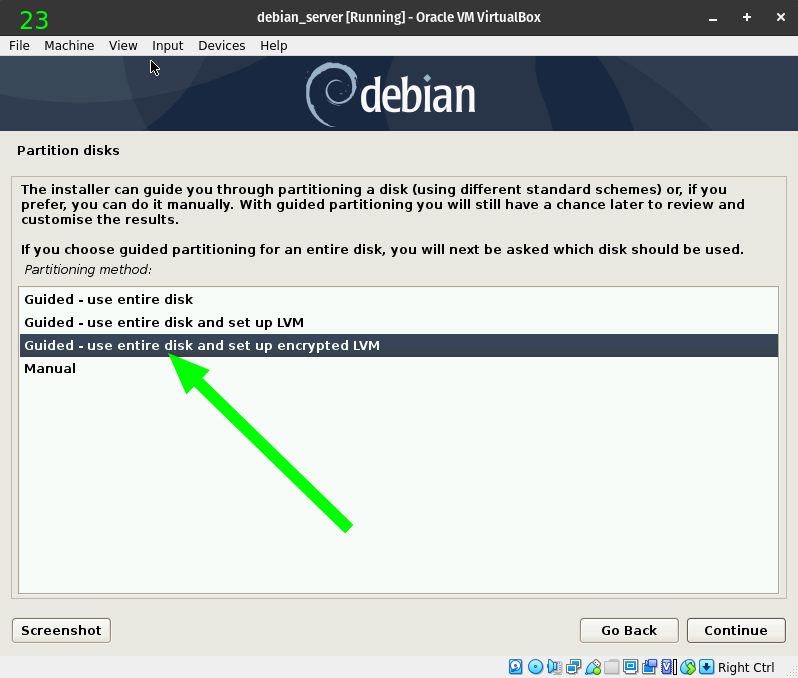
- Select the encrypted LVM option here. If you don’t need it, select whatever you want, however I’ll show you how to configure the system so no one can read the data if they have your disk.
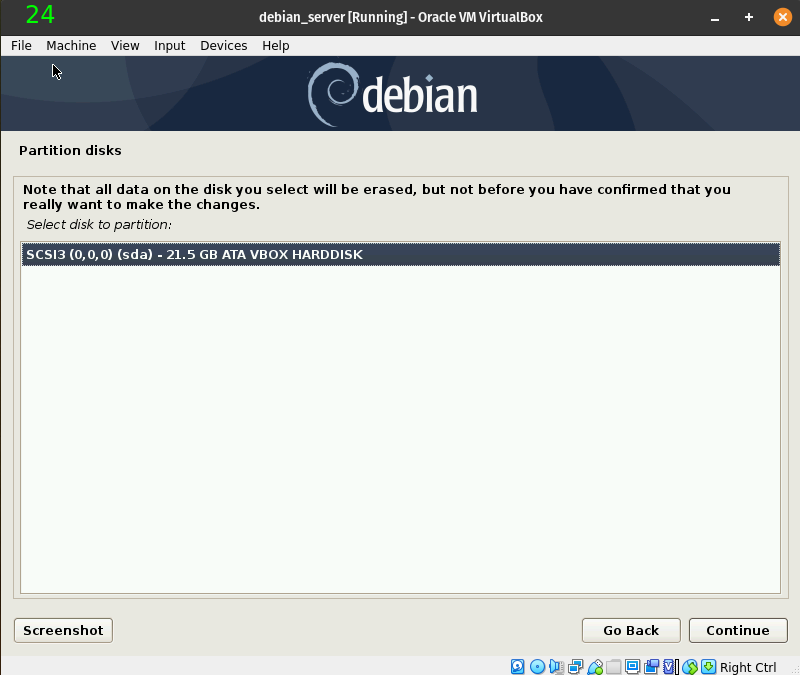
- If you have multiple drives, they will be listed here. However, in a VM you will likely only have one option. Make sure you are selecting the drive that you intend to install Debian on or you will overwrite important data.
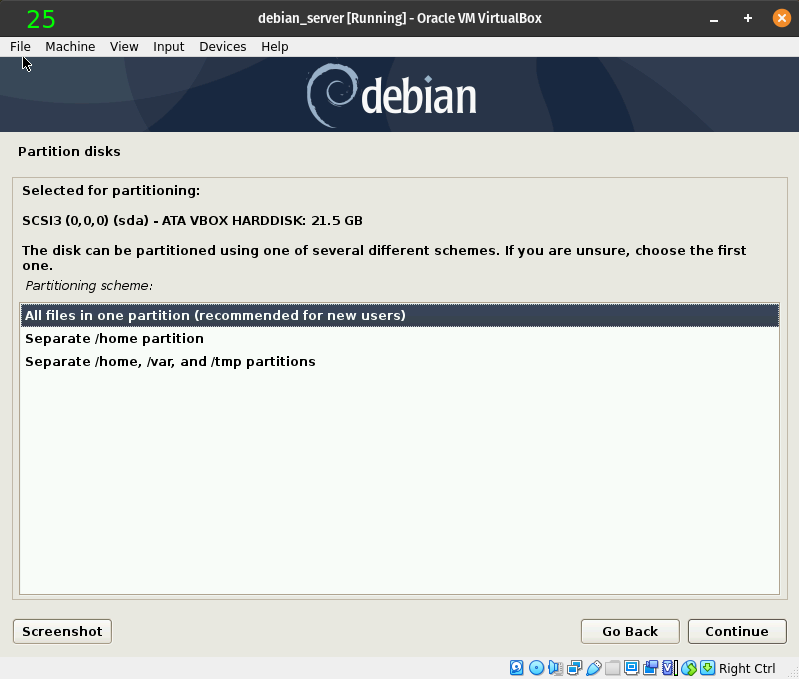
- Select All files in one partition.
- For our purposes there is no reason to manually format different partitions. This was done back in the day as RAID/redundant-type filesystems weren’t prevalent or stable. This allowed System Administrators to quickly change partitions etc, in case of system failure. It also came down to money and scalability. You can run your essential services on higher-cost disks for speed and reliability and keep user-space files on cheaper, slower hardware. In data centers this mattered. Anywhere else, not so much.
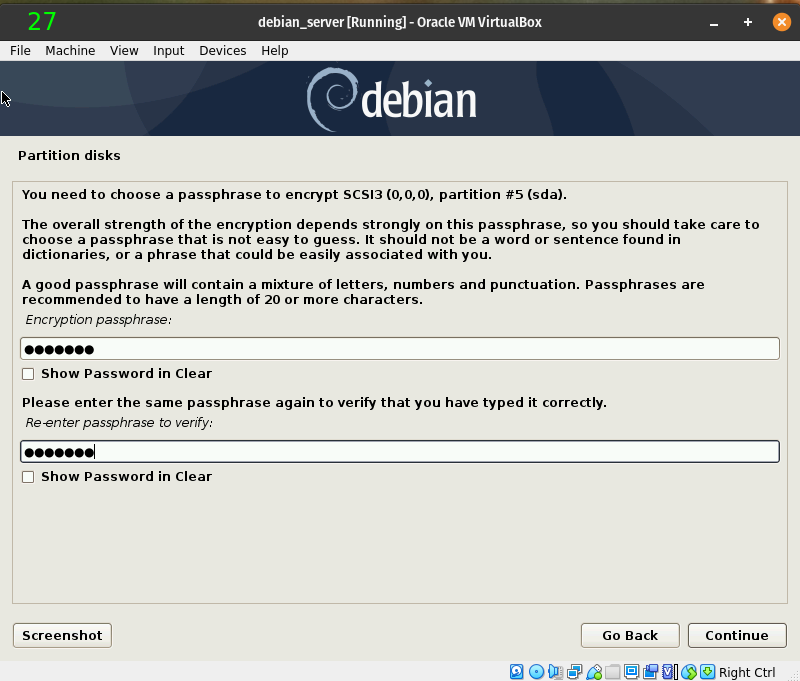
- Input a good password. I did not, so let’s see what happens.
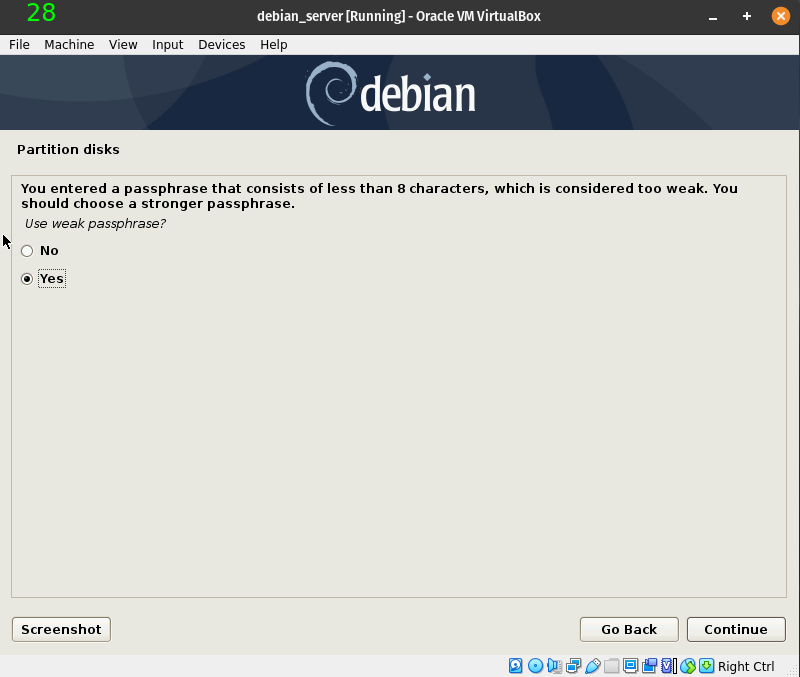
- Heed the warning! Note that it does permit you to continue.
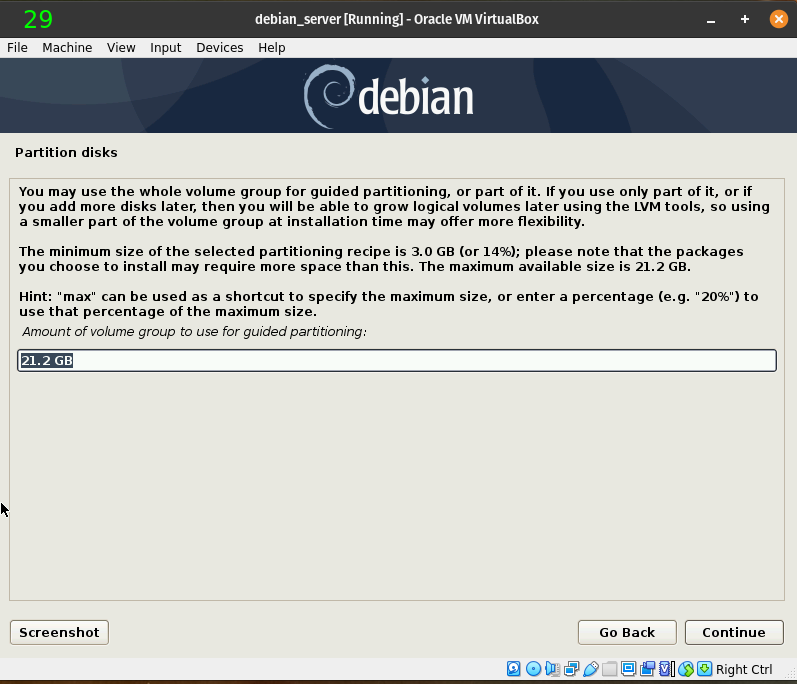
- If you intend on using the space that you allocated in VB for other partitions, then don’t use the entire volume space. We will use it all however. Select Continue.
- Last chance! Select Finish partitioning and write changes to disk and select Continue.
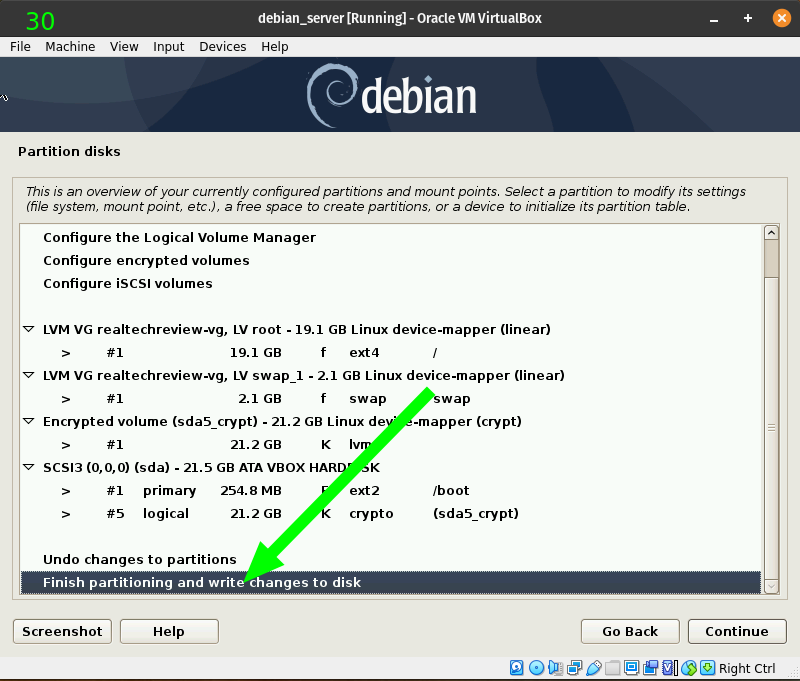
- Wait what? That was not the last chance? OK,, so my beloved Debian doesn’t have the most intuitive installer. Leave a comment if you disagree.
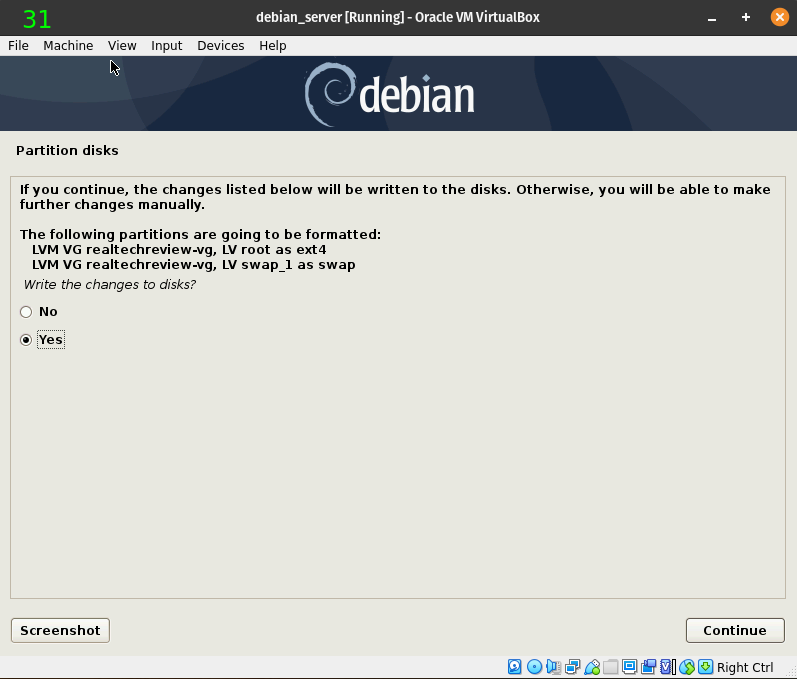
- Select Yes and then Continue.
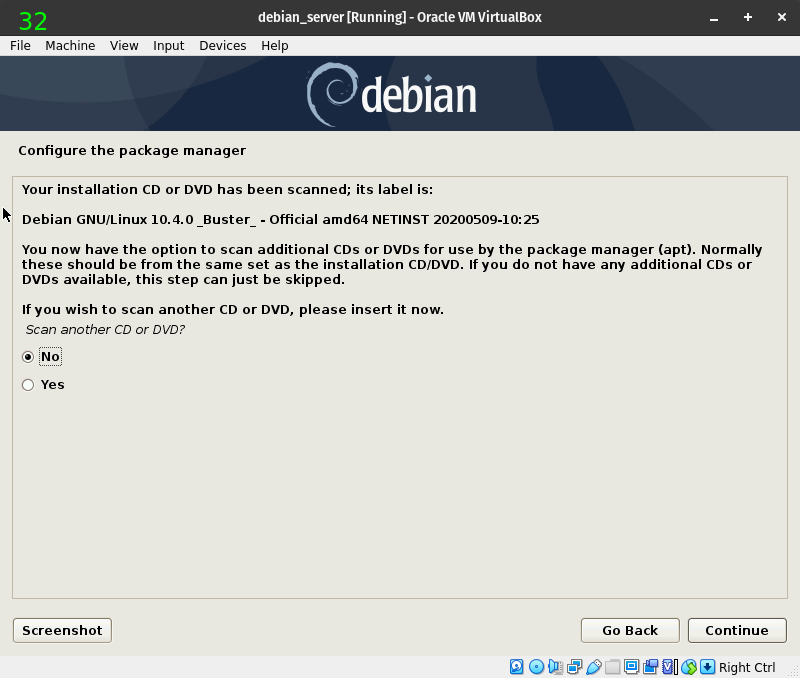
- Select No and then Continue.
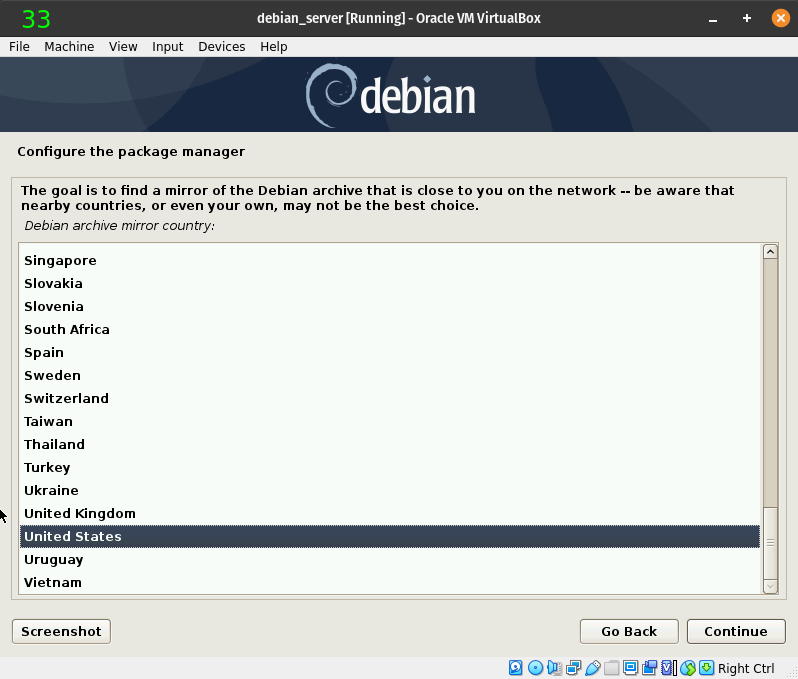
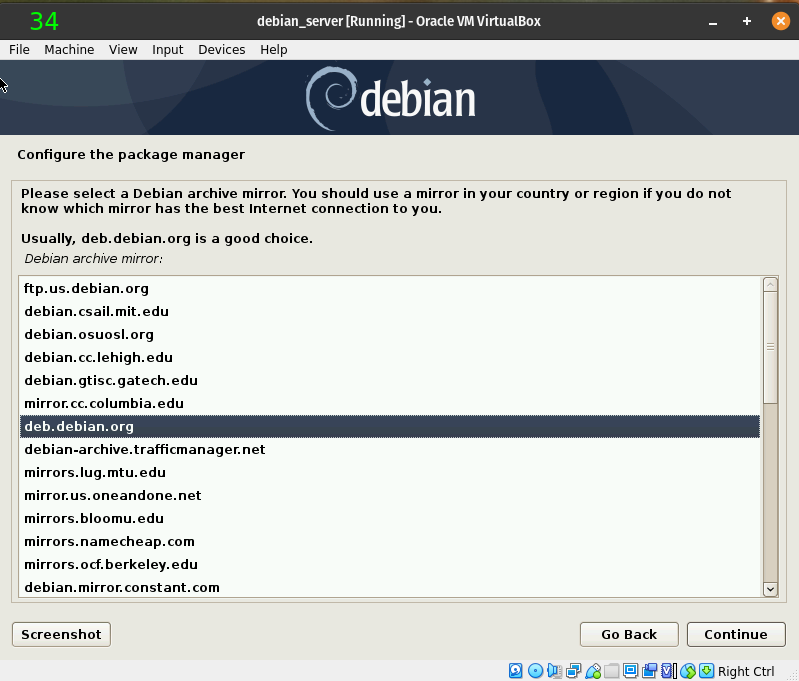
- Select a mirror closest to you and then Continue. This comes down to speed. Any one will work although you may experience higher latency the further away you get.
- Select the closest to you and then Continue. Again, this is about time/latency.
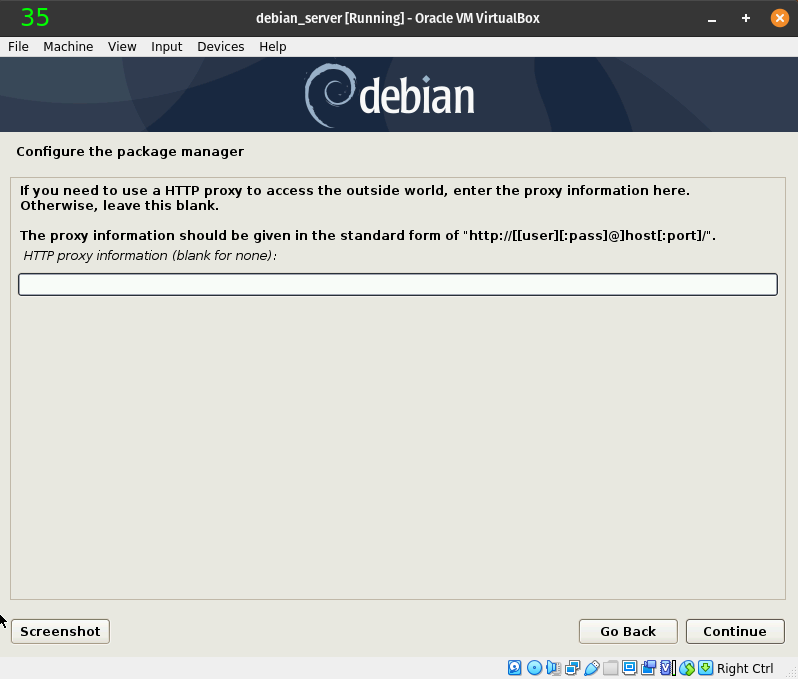
- Leave it blank and select Continue.
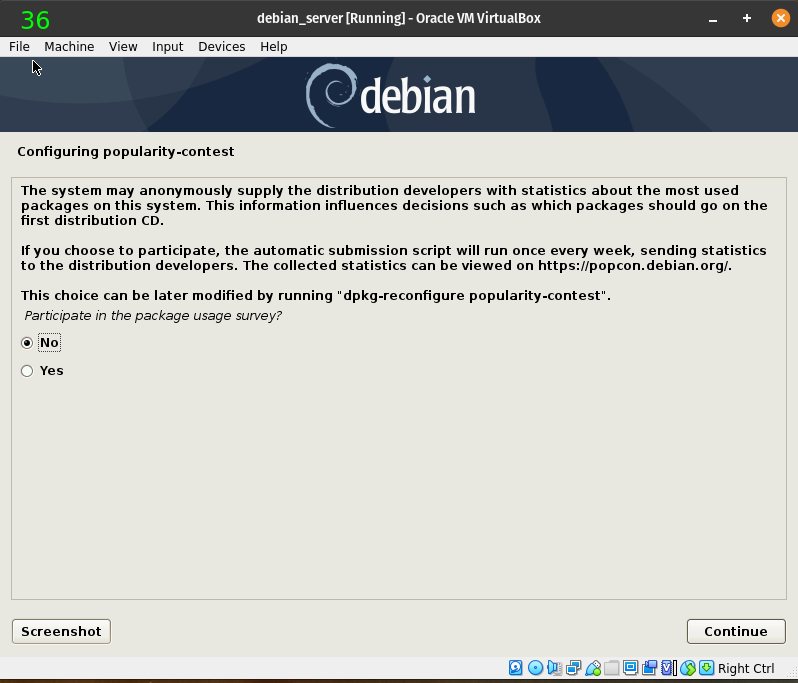
- You choose. I won’t tell you what to do here. This sends anonymous data to the Debian project. Debian is kind enough to set this to No as default.
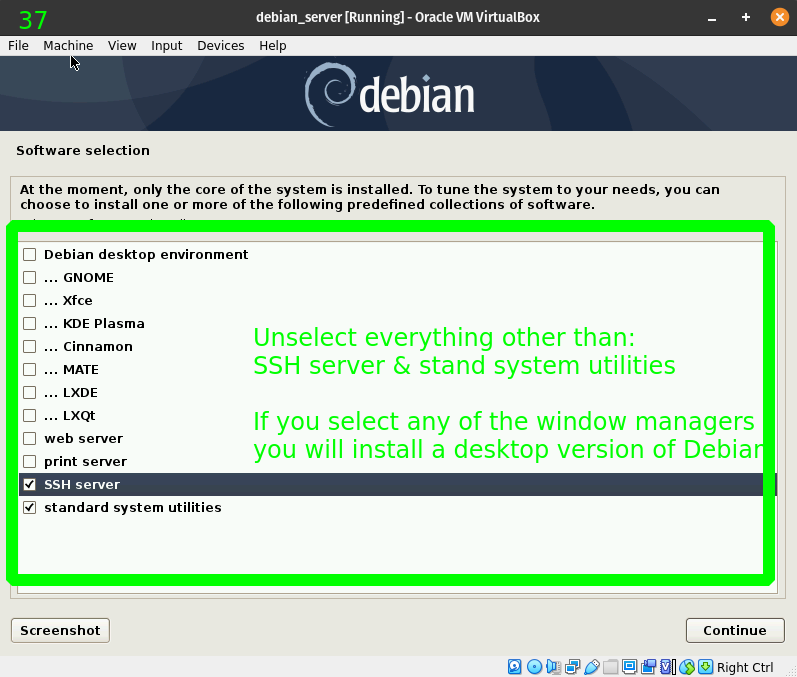
- This is where you define your system as being headless or making it a desktop environment. It’s not intuitive however. What you have to do is unselect everything but SSH server and standard system utilities and then Continue.
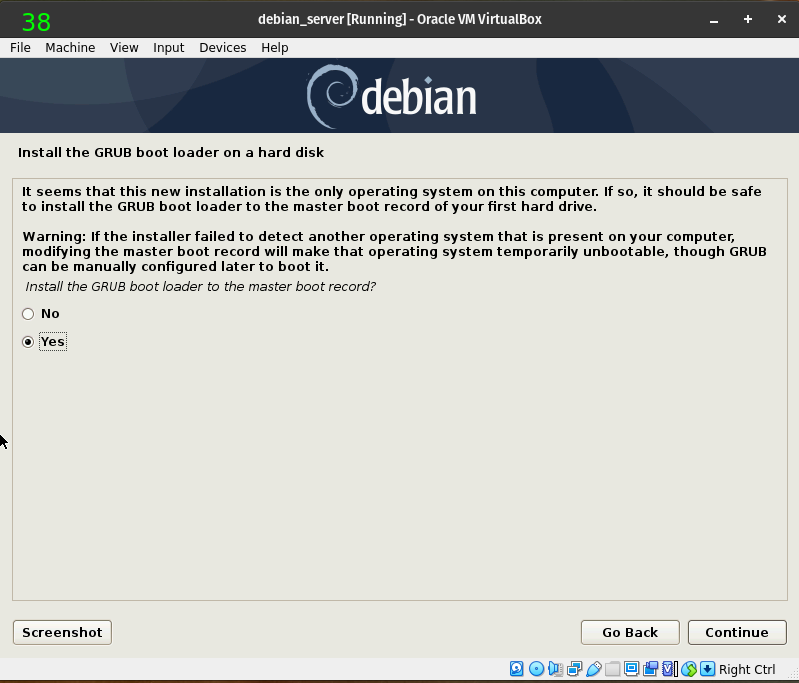
- Select Yes and then Continue to install the GRUB boot loader. This is the program that starts the operating system.
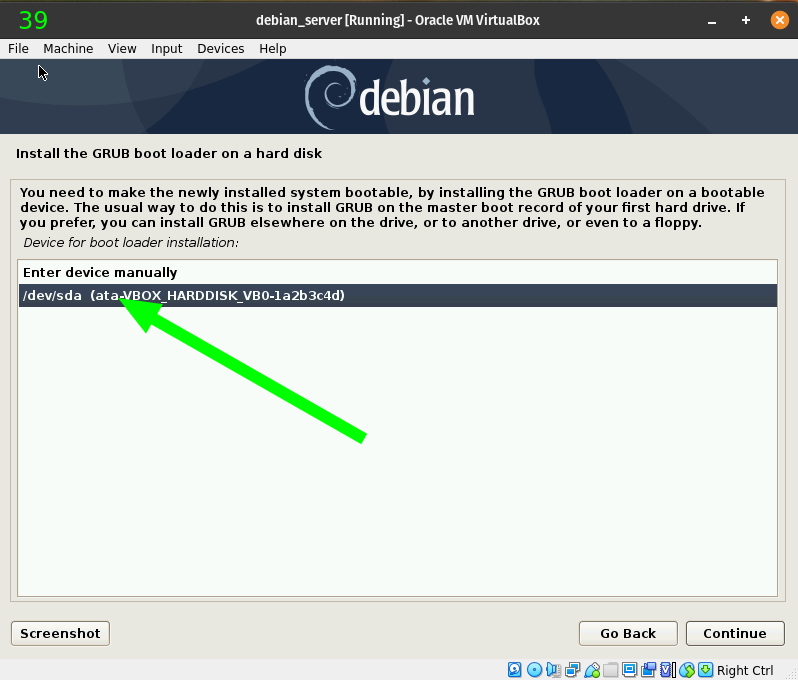
- If you had multiple drives, this would depict them. As we don’t, select /dev/sda and Continue.
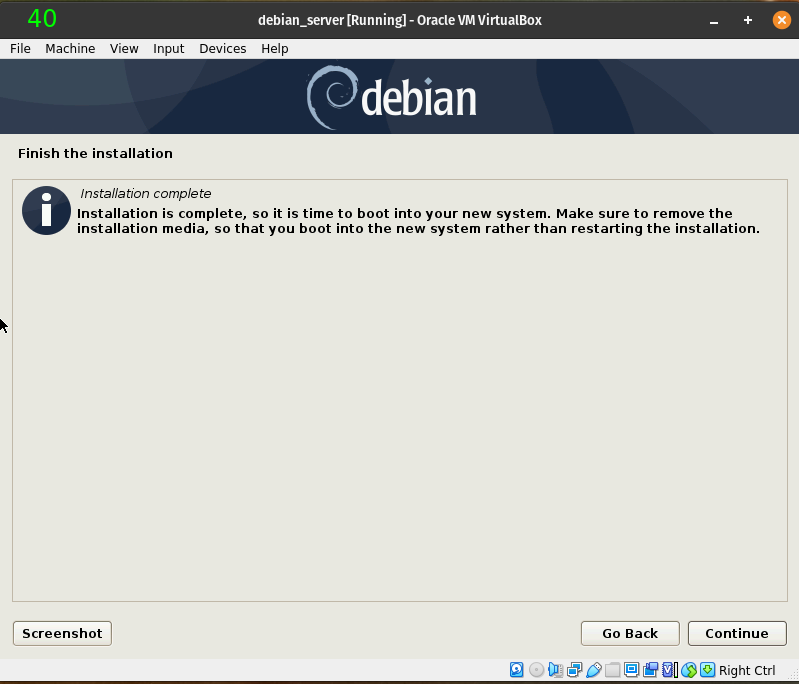
- Select Continue.
- You are done! I know that was a lot of steps, however you only need to learn it once. In time you will learn to breeze right through the installation of any Linux system. Debian is one of the most challenging to install, namely because the installer is stuck in 2000. I personally believe in the “if it ain’t broke, don’t fix it” mentality. We certainly could use an upgrade to the installer, however.
Configure Debian:
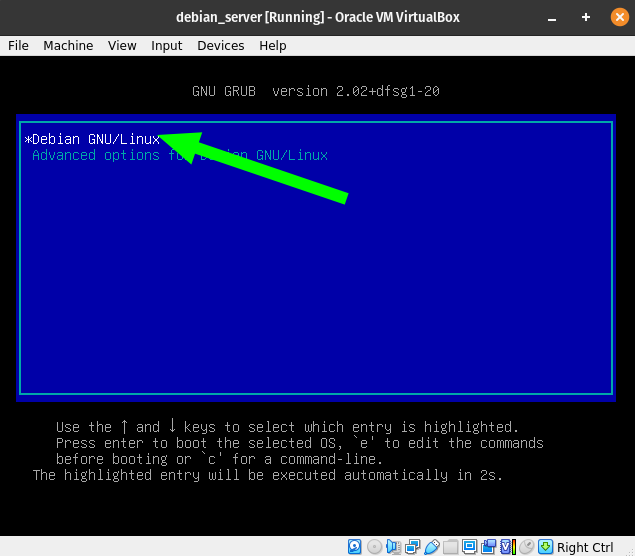
- It should automatically reboot in to the boot loader and you will have a couple options on how/where to boot.
- Select Debian GNU/Linux, or let it time-out.
- You will be presented with an option to unlock the encrypted volume. Enter your encryption password and hit Enter.
- Note, these warnings are harmless.
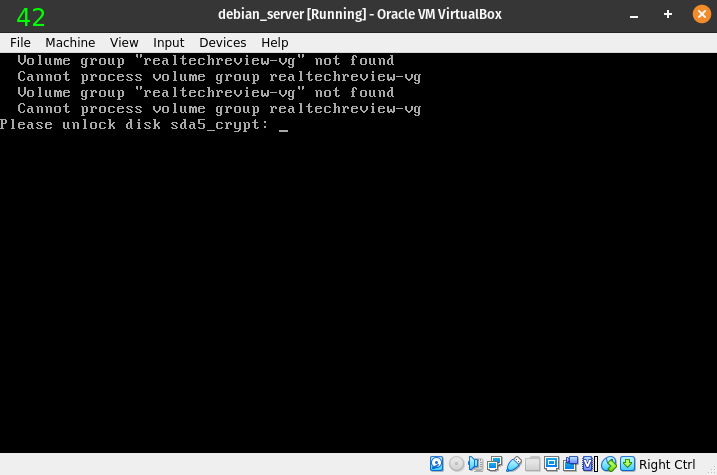
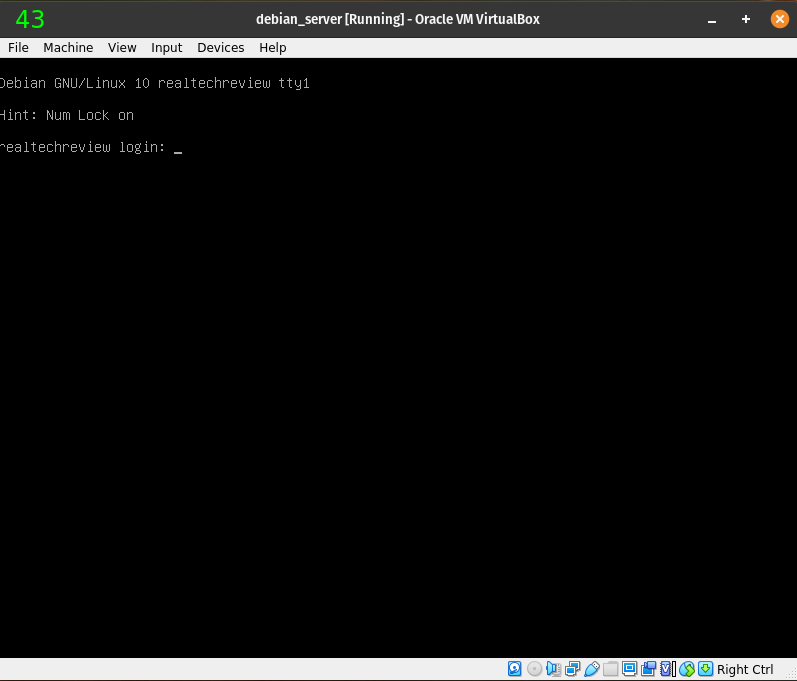
- Once you enter your encryption password, your Linux partition will unlock and boot in to a Login screen.
- Enter your admin name followed by it’s password.
- Note that Debian is kind enough to warn us when out Number Lock is on!
You have now configured VirtualBox and installed Debian 10+.
Where do you go from here?
I’d suggest you to update your resume if you had not. You now have experience with Linux operating systems.
This will be the basis for many upcoming tutorials that use Debian. Please check out the Tutorials page and search for Debian for projects or help using the Debian operating system.
I hope this article can help you get started on many fun and meaningful projects with Debian!


More Stories
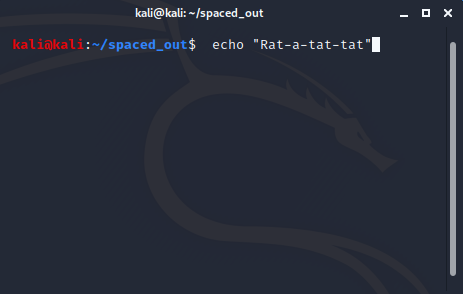
Terminal Trick To Avoid Writing A Command To .bash_history